3. Network
3.1 Overview
The Network page configures the gateway's physical interfaces — assigning IP addresses, defining zones, and setting each interface's role. On standard 2-NIC hardware, LAN1 handles both regular client traffic and administrative access, following the same convention pfSense and OPNsense use for minimal hardware.
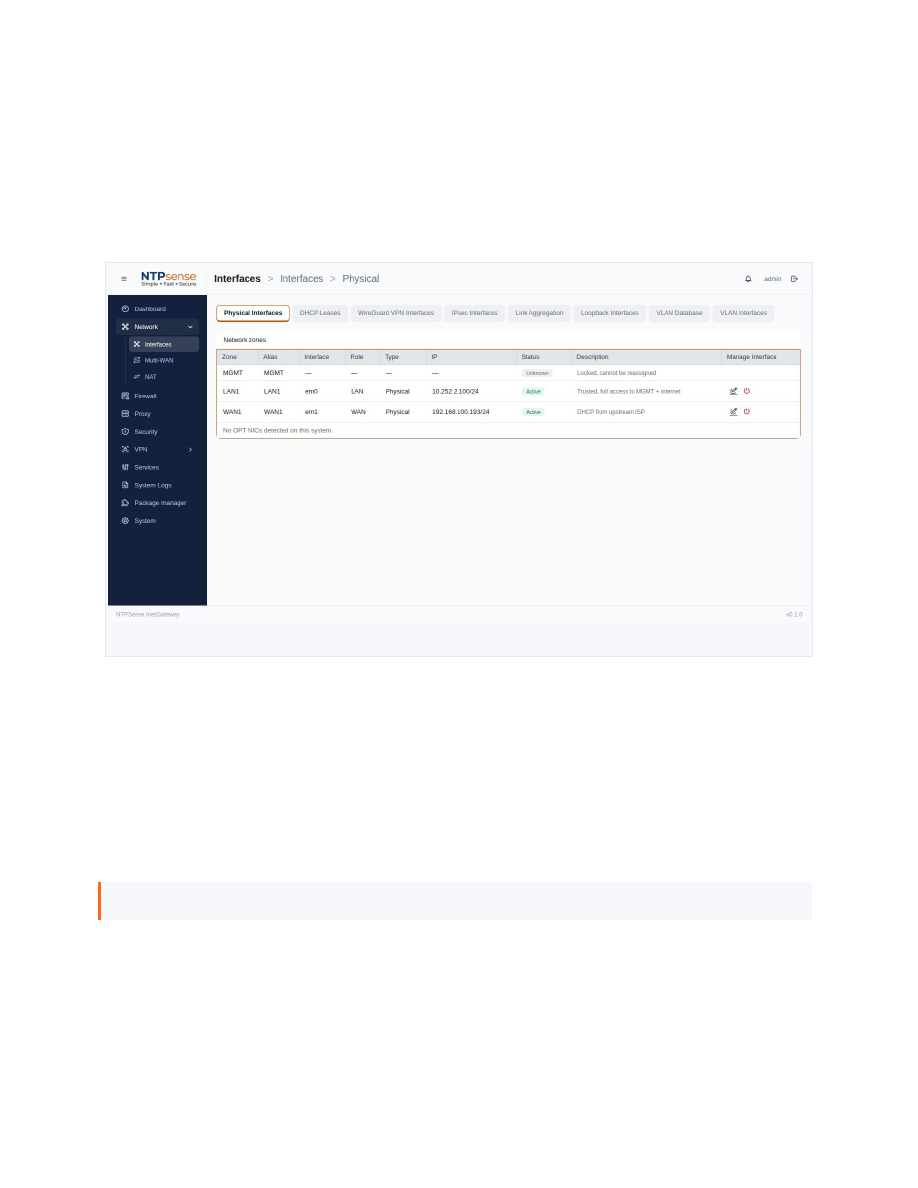 Network page — interface overview
3.2 Understanding Zones
- LAN1 — your internal network. Devices here can reach the internet and, by default, the Web UI/console.
- WAN1 — your internet-facing connection, typically DHCP unless you have a fixed IP.
- Additional zones (DMZ, guest networks) can be added on hardware with more than two NICs, or via VLANs.
Note
On 2-NIC hardware, an anti-lockout rule is always active on LAN1 — you cannot accidentally firewall yourself out of the Web UI from the LAN side.
3.3 Configuring an Interface
- Open the Network page and select the interface you want to configure.
- Choose Static or DHCP.
- If Static, enter the IP address and subnet (CIDR notation, e.g.
10.252.1.100/24). - Save. The change applies immediately.
Warning
Changing LAN1's IP while connected through that same interface will disconnect your current session.
3.4 Interface Roles
Each interface shows a Role — MGMT, LAN, WAN, DMZ, or Undefined — used elsewhere in the system (e.g. to populate the list of eligible WAN interfaces on the Security page).
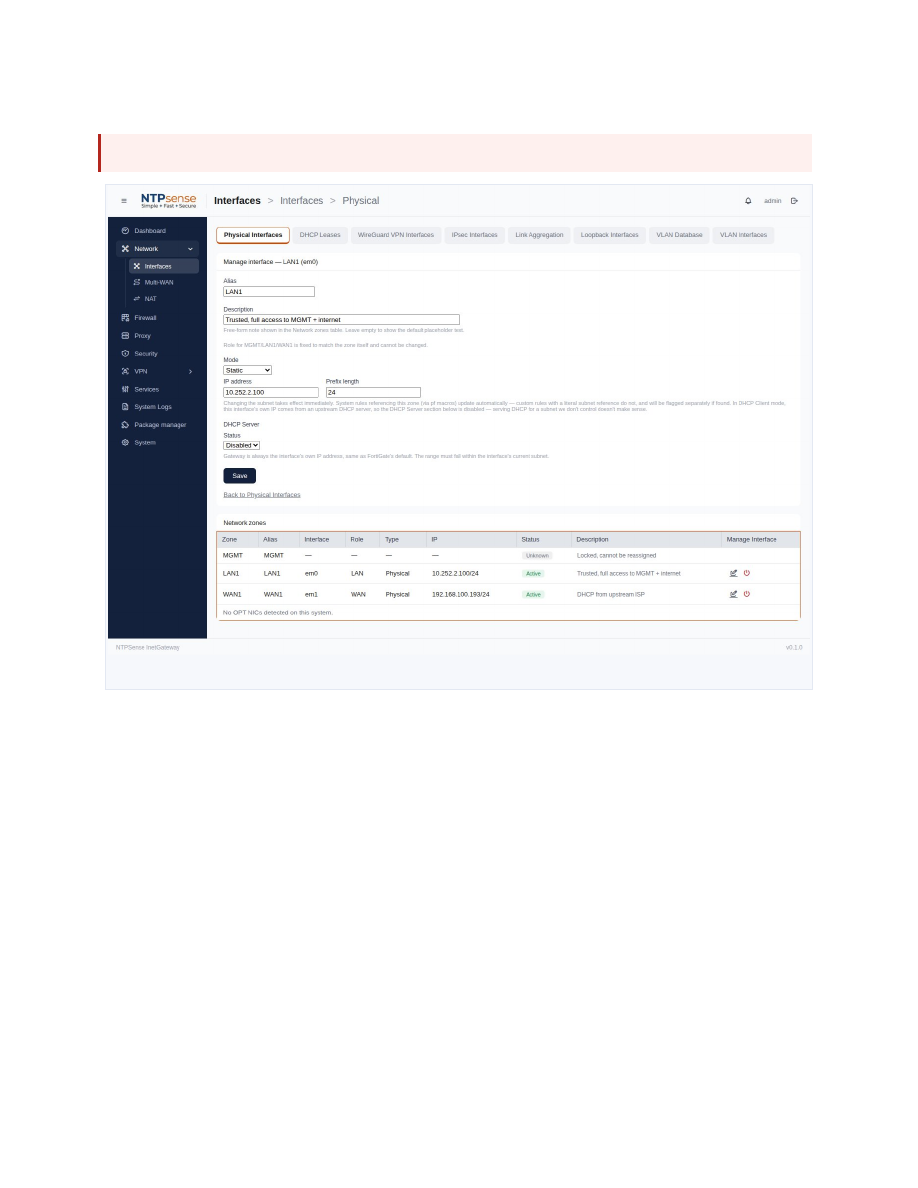 Interface role assignment
3.5 Interface Status
A status badge shows one of four states: Disabled, Down (no link detected), Active, or Unknown.