1. Getting Started
1.1 What is NTPSense CE?
NTPSense InetGateway Community Edition (CE) is a free, open-source network gateway appliance built on FreeBSD. It combines a firewall, DHCP server, VPN, and web proxy into a single self-installing system, managed through a web interface or a console menu.
This manual covers CE as installed from the official ISO available at ntpsense.com/download.html.
1.2 What You'll Need
| Field | Description |
|---|---|
| Hardware | Any x86-64 (amd64) machine with at least 2 wired Ethernet ports — one for LAN, one for WAN. A mini-PC, an old desktop, or a VM all work. |
| Memory | 4 GB RAM minimum. More is recommended if you plan to enable the IDS/IPS (Suricata) or proxy features. |
| Disk | 20 GB or larger. The installer uses the entire disk, so make sure nothing important is on it. |
| USB drive | 2 GB or larger, to write the installer ISO to (unless installing into a VM, where the ISO can be mounted directly). |
1.3 Downloading and Writing the Installer
- Go to ntpsense.com/download.html and download the ISO file (the checksum file next to it lets you verify the download afterward, if you'd like).
- Write the ISO to your USB drive. On Linux or macOS, this is typically done with the
ddcommand; on Windows, tools like Rufus or balenaEtcher work well. - If you're installing into a virtual machine instead, you can usually mount the ISO directly as a virtual CD-ROM — no USB drive needed.
Note
The full command for writing the ISO with dd, along with the exact download link, is available on the download page itself.
1.4 Installing NTPSense CE
Installation is fully automated — once you boot from the ISO, there are no prompts to answer.
- Connect the machine's two network ports: one to your existing internet connection (this becomes WAN), and one that will become your new LAN.
- Boot the machine from the USB drive (or the mounted ISO, if using a VM).
- Wait. The installer partitions the disk, installs the base system, and configures the gateway — all without any input from you.
- The machine reboots automatically once installation finishes.
Warning
The installer erases the entire disk it's installed to. Double-check you're booting the right machine before starting, especially if it has other data on it.
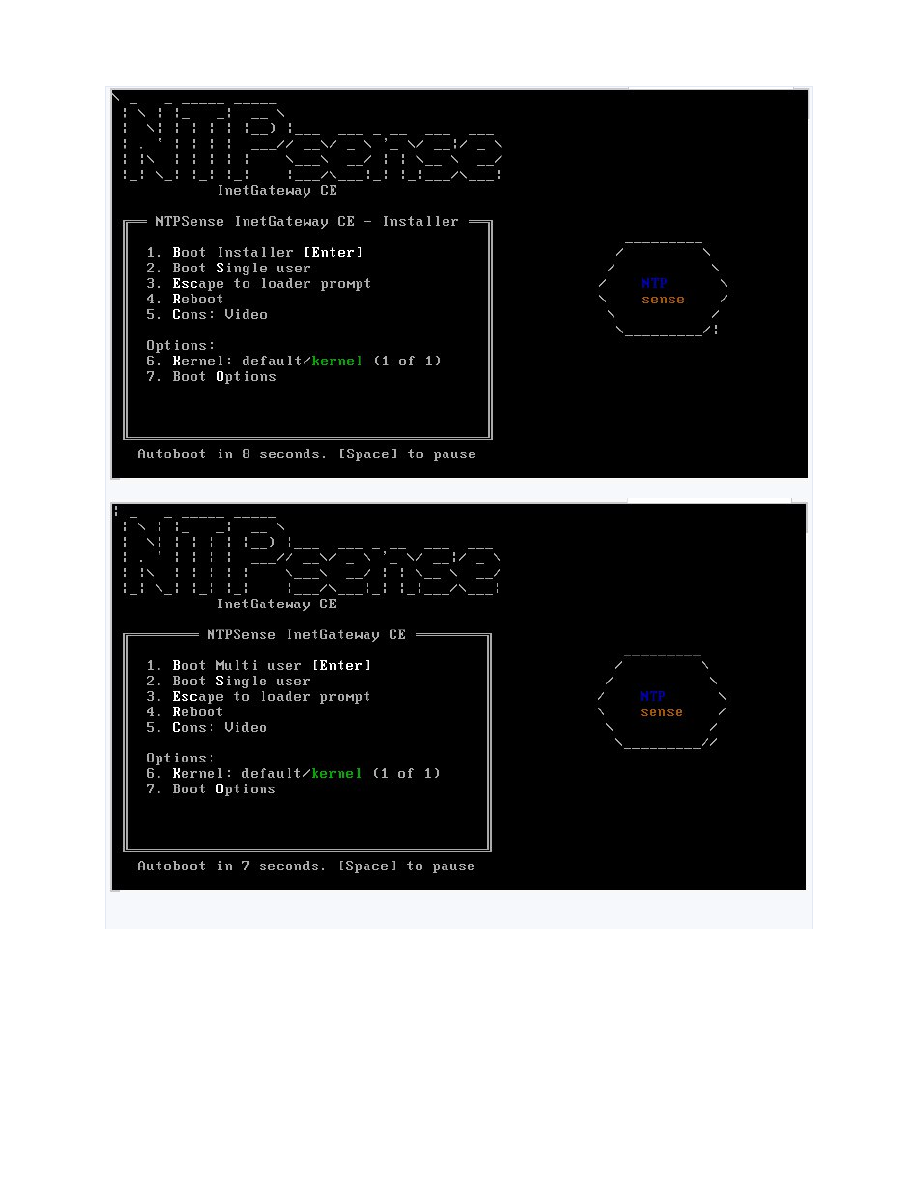 Boot loader — NTPSense branding on both the installer and multi-user boot menu
1.5 First Login
Once installation completes and the gateway has rebooted, connect a computer to the LAN port.
- Open a web browser and go to
https://10.252.1.100/(or whichever address your specific installer variant uses — this is shown briefly on the console during first boot). - Your browser will warn you about a self-signed certificate. This is expected — click through to proceed.
- Log in with the default credentials: username
admin, passwordadmin. - You'll be required to change this password immediately. Choose something you'll remember — there's no "forgot password" link for a device you administer directly.
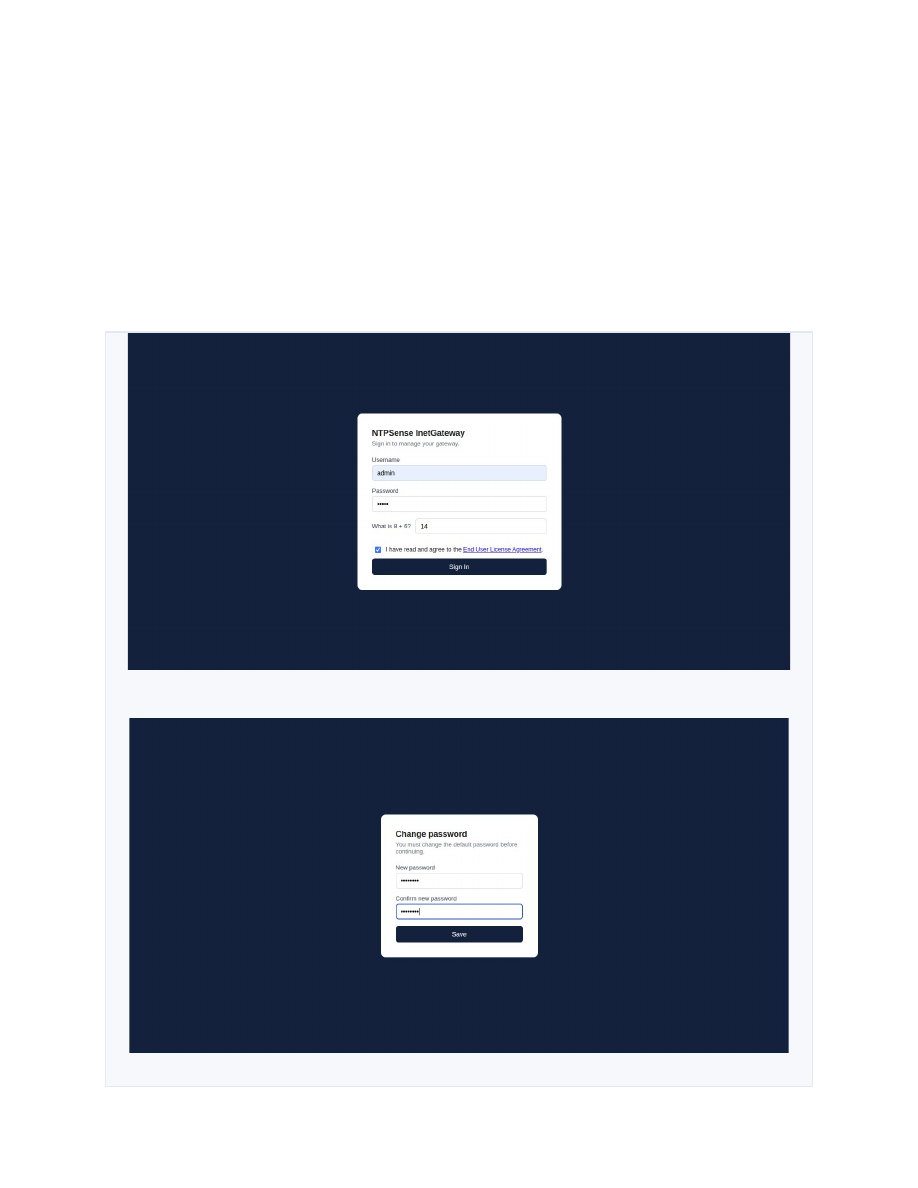 Login page
1.6 Reading and Accepting the License Agreement
Before you can sign in, you'll be asked to check a box confirming you've read the End User License Agreement (EULA). NTPSense CE is licensed under the Apache License 2.0 — a permissive open-source license that lets you use, modify, and redistribute the software freely, including commercially.
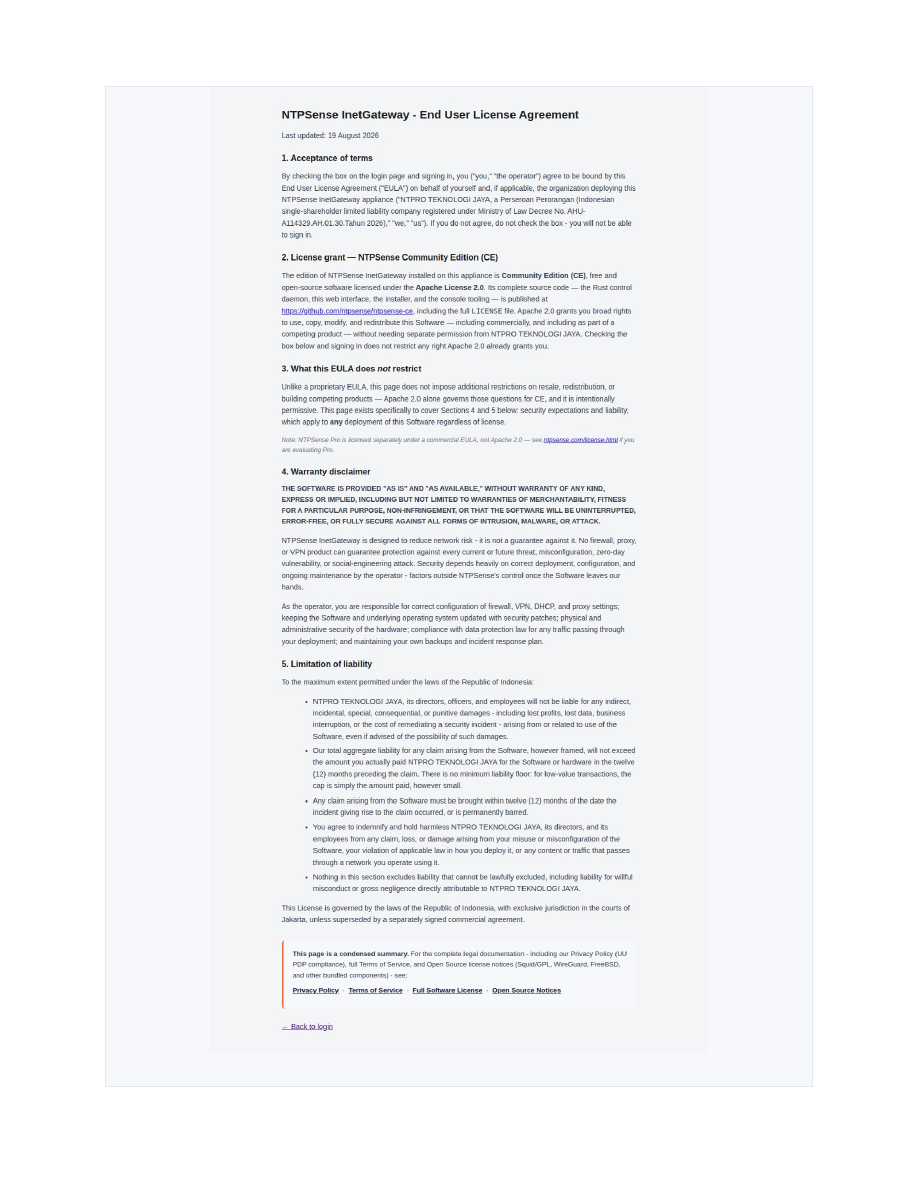 End User License Agreement page
1.7 Console Access (Optional)
Alongside the web interface, NTPSense CE includes a full administration menu accessible over SSH or a direct serial/keyboard connection. Log in with the same admin account and password — the console menu will show only the options your account's role permits.
Note
Console access uses the same role-based permissions as the web interface. An Administrator account sees the full menu; more restricted roles (Network Operator, Auditor) see a filtered subset.